Creating a Nash Workflow

To create a new workflow, go to the Workflow tab, and click the plus icon.
Click on the plus icon to start a new workflow.
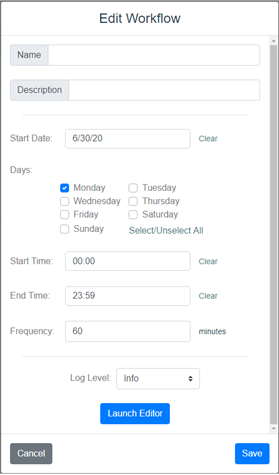
That will then take you to the Workflow Edit Workflow setting page, as shown below, where you configure the workflow name, description, processing frequency, and log level.
Note. Workflows must be named uniquely within a workspace.
Schedule
The workflow processing schedule can be set up to run on certain days and times and set up to run after a certain day.
Coming soon! We will allow workflows to be run using webhook URLs. Potential uses are custom buttons and widgets launched from other applications.
Log Level
Log levels are set in the settings screen. Setting up the proper logging is important to make logging useful. Logging is available in the logs screen and in the workflow in the bottom drawer.
- None – No logging.
- Error – Logs for errors only. No tracking of successful transactions.
- Warn – Logs errors and warnings such as those for null value fields and schema mismatching. No tracking successful transactions.
- Info – This is the most useful when you are building your workflow. This displays all log nodes, outputs, warnings, and errors. When processing in the drawer with large numbers of transactions the browser is likely to fall behind or loose logs.
- Debug – This log level is verbose. Every single set value, entering and leavings nodes and choices made in switches. Only use this log level on single inputs. The browser is likely to become disconnected from the log session. It is very good for finding small, weird problems like schema mismatches in switches, but it should be used sparingly.
Clicking the Launch Editor button will open the workflow’s work area for building your flow.

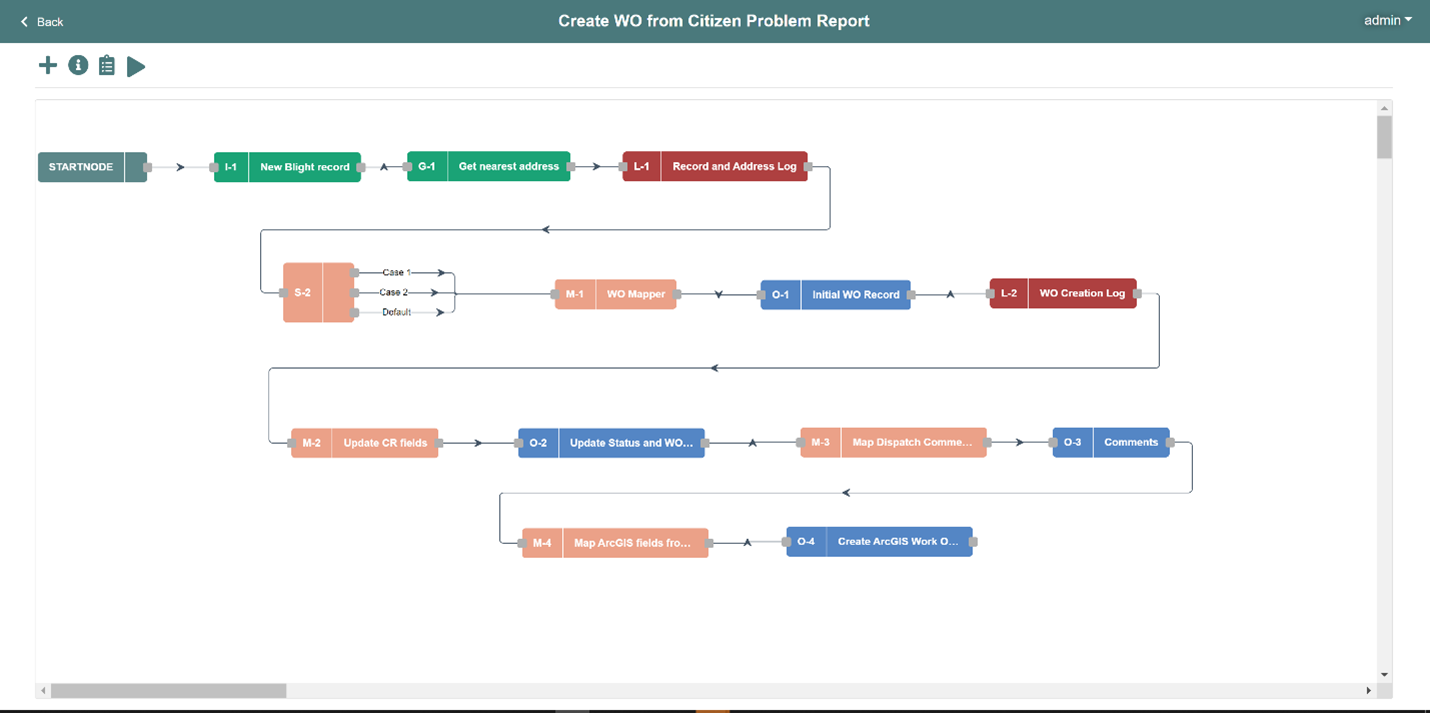
Clicking the title or the edit workflow opens the workflows work area. If the workflow is active or being edited by another user, the workflow will open in read-only mode. This protects from the flow running on a schedule and incomplete logic creating unexpected data or errors. This area is where Nodes can be placed and linked to perform logic. Node functionality is covered below

As shown in the figure above, the plus icon adds nodes to the flow. The clipboard icon opens the log drawer and the play icon opens the log drawer and runs the flow.