Migrating Workflows
Ready to migrate your Nash workflows from one environment to another? It’s a straightforward process, and this article will guide you through it step by step. Let’s get started:
1. Planning is Essential: Begin with a solid plan. Understand the components you’ll need, such as GIS services and Maximo object structures. Detailed notes from your development and testing phases are invaluable. Remember, thorough testing is crucial before moving anything to production.
2. Prepare Your Services and Structures: Before migrating, ensure your GIS services and Object Structures are ready. Collaboration with various department administrators might be necessary to deploy each component. Your development phase notes will be a great reference here to ensure accuracy in your requests.
3. Ensure Consistency Between Test and Production: This is a critical step. Any discrepancy, no matter how small, can cause issues. Compare the JSON from your Test and Production environments using a comparison tool like Beyond Compare or jsondiff.com. Keep in mind that differences in field order don’t always indicate a problem.
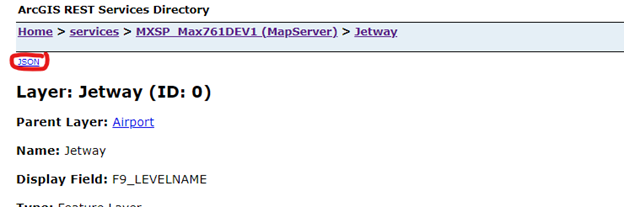
Figure 1: Showing the location of a layers JSON data in a REST service
Verifying Object Structures in Maximo can be a bit of a challenge. It is important to make sure that the Object Structures exist, reference the same tables, tables have the same fields, the Exclude/Include fields are the same, and the Inbound setting restrictions match. Any differences can cause unexpected behavior and can result in poor user experience.
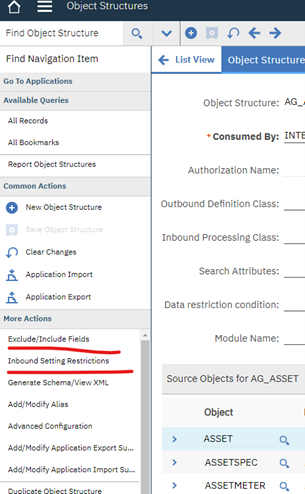
Figure 2: Showing More actions to compare Object Structures in Maximo
4. Exporting Workflows from Test: Exporting workflows from your Test workspace in Nash is simple. Log in, navigate to the Test workspace, and for each workflow you wish to migrate, use the export option in the gear menu. You can save these as files or copy them to your clipboard.
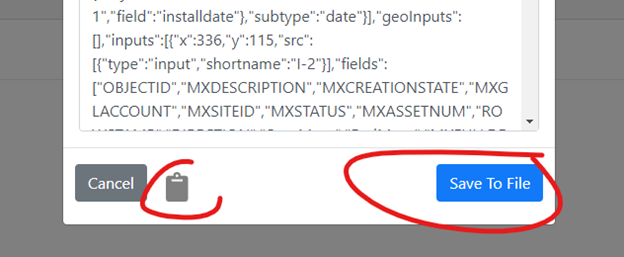
Figure 3: Copy to clipboard and save to file options
5. Importing Workflows into Production: Now, move to your Production workspace. If you need to set up a new workspace, you can do so from the user menu. Use the import function to add your workflow definitions. Repeat this process for each workflow you’re migrating.
Figure 4: Importing Nash JSON to new workflow.
6. Update Connections for Production: After migration, adjust the connection URLs to point to your Production environment. This can be done in the connection settings. If you’ve maintained consistent connection names across different environments, this step should be straightforward.
And there you have it! With careful planning and attention to detail, migrating workflows in Nash can be a smooth process. If you have any questions or need further assistance, feel free to reach out to your ActiveG representative.