Selecting Map Features
One of the most basic map interactions in MapEngine is to click on a map feature to select it. Selecting the map feature allows you to 1) get more information and 2) perform an action that includes the map selection(s).
Selections can be performed on any active map layer (or layers that you have enabled in the legend). Map selections are defined as any items on the map that are selected, highlighted on the map (usually in green or red), and listed in the Map Selected Features window.
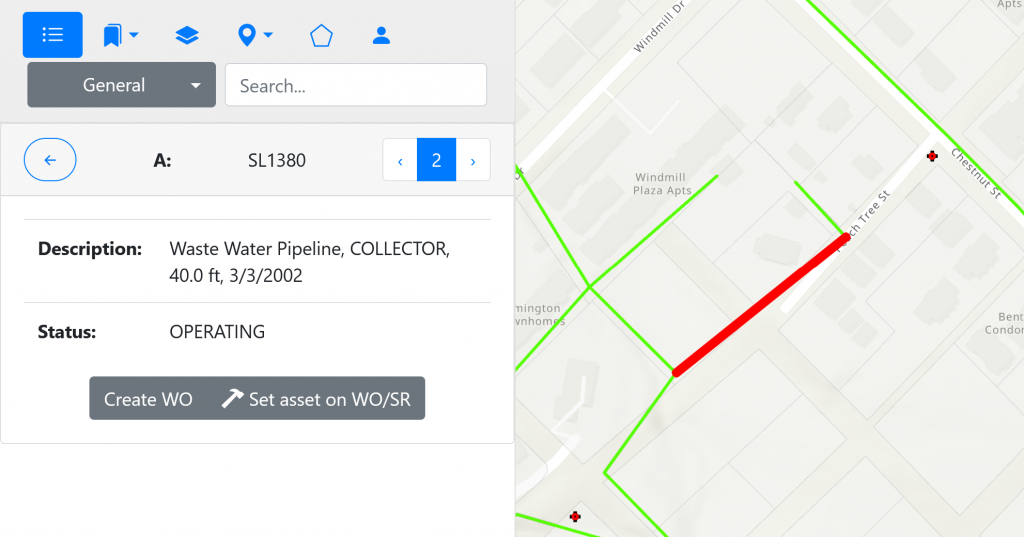
Selected Features window

Many options are packed into the Selected Features window. Most importantly (and obviously), it lists all the GIS features selected on the map. Again, selections can be performed on any active map layer.
Clicking on a row in the Selected Features list will do two things:
- Move/pan/zoom the map to that clicked item.
- Open the detailed Info Card, which presents more information about the selected item.
Select by clicking on the map
As mentioned above, the most basic map operation is to click on an object to select it.
- With your cursor
 , click directly on a map feature to select it.
 - Once selected, the feature result will appear in the Selected Features list, the map feature will have a red highlight, and details will appear in the info card.
Note: The info card (tooltip) is configurable, so if there are more details you need to see, either from GIS or Maximo, contact your administrator to get them added.
There are a few more ways to create a selection, as explained below.
Selecting Multiple Items
To select multiple features at a time, you have two options:
- Hold the SHIFT key and then click on several items on the map.
- Select the Multi Select button on the Map Selected Features list and then click on several items on the map.

Why would you want to select multiple map features? You may want to see a list of work orders or assets based on a Maximo query. Or you might want to choose several work orders on the map and edit or update all of them at once. Or, you might want to select assets or work on the map, and push that list back to Maximo. For all of these options, you need to view the list of selected map items, which show up in the Selected Features window.
When many map items are close together
If you click on the map where more than one feature is within close proximity of other features, all these features may be selected and appear in the Selected Features list. If you want to limit your selections, zoom in your view, using the plus/minus icons on the bottom right of the screen, or use your mouse wheel to zoom in, and then click. Or, you might try limiting the kinds of GIS features that will respond to a click, using the Select a Layer option.
Selectable Layers
You can set a specific map layer to be selectable, meaning only the layer(s) you specify will be selectable by clicking or drawing. Before making a selection, choose a layer to select from. This is done in the Select a Layer drop-down menu at the top right of the screen:
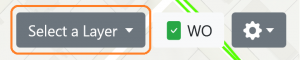
Click the menu to select, deselect, or clear layer you want to explicitly. With this mode enabled, only the layers you choose will respond to a map click.
Select by drawing a polygon
Once you’ve designated a selectable layer, you can use the polygon tools to select several features at a time. To use each of these options, make sure to set a layer selectable!

Select from a freehand polygon. Click the button, choose a layer(s) from the Select a Layer menu, then draw a polygon using your mouse to select items.
Select from a rectangle. Click the button, choose a layer(s) from the Select a Layer menu, then draw a rectancle using your mouse to select items.
Select from the current map window/extent. Essentially uses the current screen as the selection rectangle. Make sure to set a layer selectable! .
Remove all selections from the Selected Features list. Just what it says.
Select by creating a buffer. This option allows you to create a buffer around a selected object (point, line, or polygon). That buffer can then be used to select other objects. For example, you can select a line (a street, a pipe section, or a transmission line) and create a 50 foot buffer around that line.
To do this, follow these steps:
- First, select (click on) the desired map feature(s) that will be the source of the buffer.
- Then click the buffer icon from the menu of selection tools.
- The Create Buffer dialog appears, and a default buffer is drawn around the selected map feature.
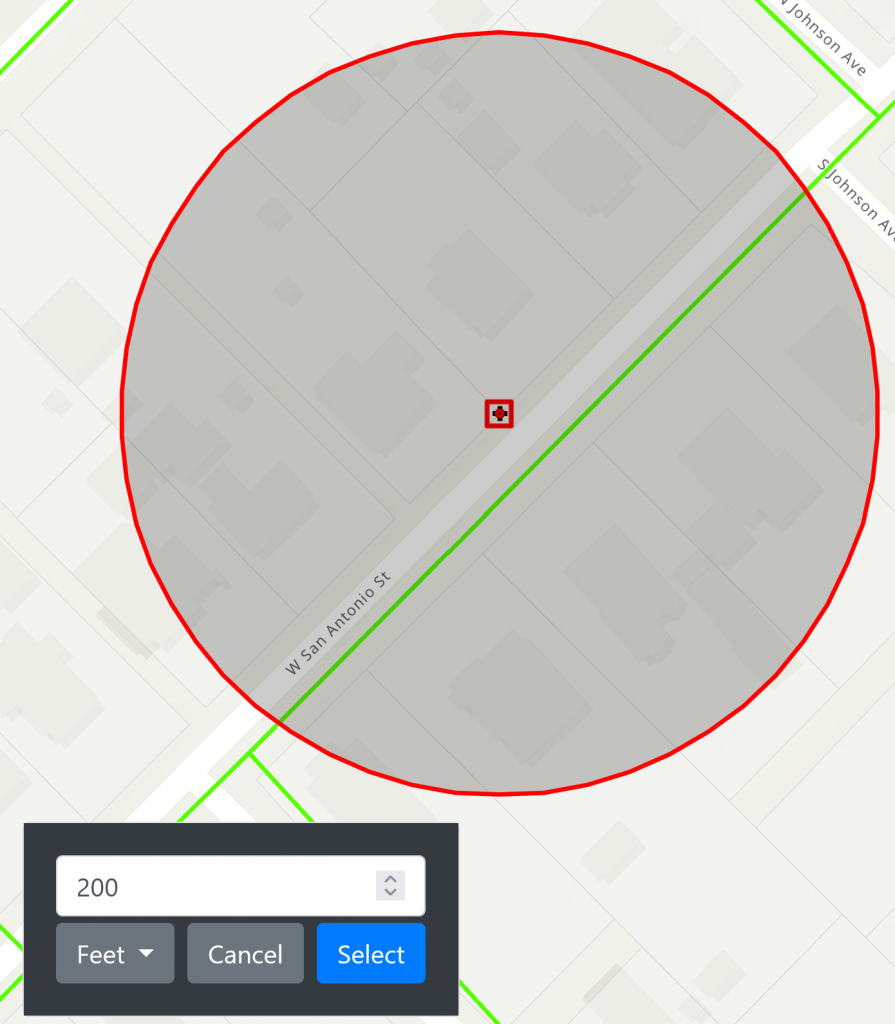
- Change the buffer distance value or a corresponding unit of measurement to modify the buffer.
- Choose a layer from the Select a Layer menu to make one layer selectable.
- Click the Select button, and the buffer will be used to select all the selectable features within the buffer.