Creating Custom WO and SR Layers
Custom work order layers are just that: Layers that you as a user can define yourself. So whether you want to see what’s new today, or view work for a specific workgroup or asset type, MapEngine lets you define personalized layers to visualize this information. And you can do this for both work orders and service requests, but for this tutorial, we’ll use work orders as our example.
All custom work order layers in MapEngine are defined by a where clause, like the kind you run on the Maximo List tab. So saved queries in Maximo can be used to define which work orders to include in the layer. Every work order layer also has a symbol to differentiate it on the map.
Getting Started
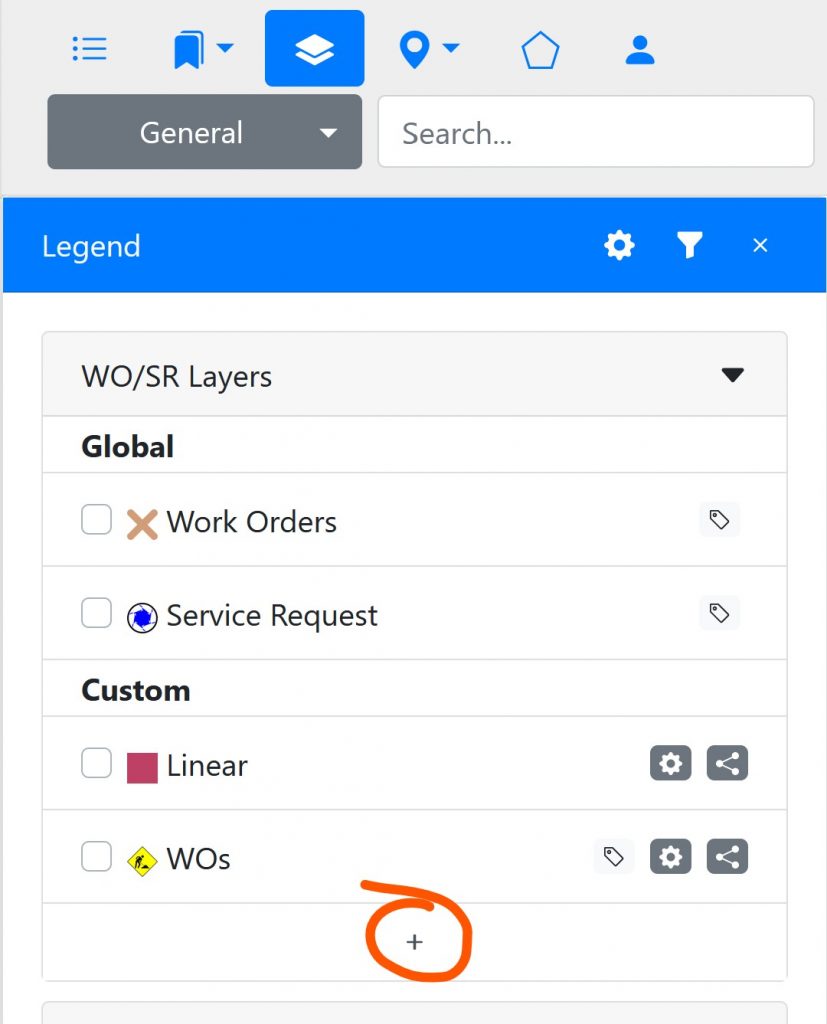
To create your own work order layer, start by clicking the Create Work Order Layer (+) button, highlighted below, in the User-Defined Work Order Layers group of the Legend window:
Then this dialog will show up: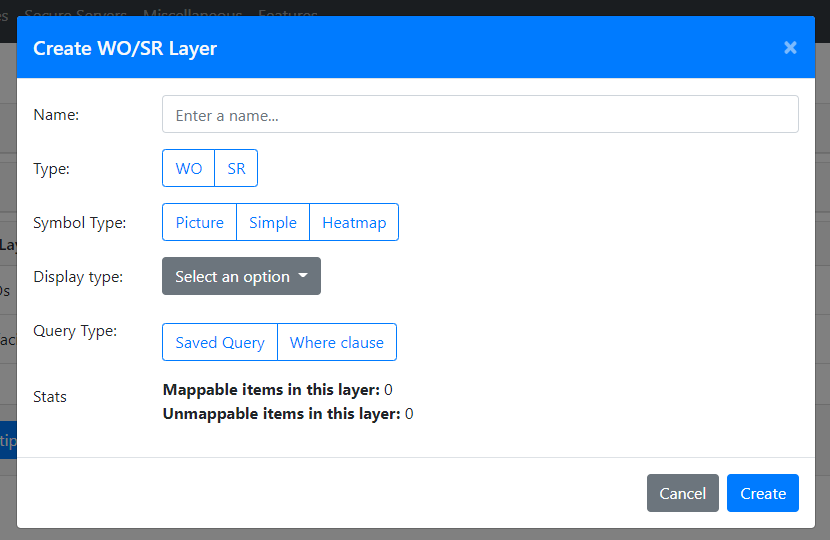
To fill out the form:
- Give the layer a name in the Name field,
- Choose the type of layer (WO or SR).
- Pick the Symbol type. Pictures will appear as they are shown; symbols can change color using the color picker in the dialog.
- Choose the Display type (personal, group, or crew–depending on your access level), This defines who can see this new layer.
- Select a query type. A Maximo-compatible where clause needs to be selected or defined. The MapEngine where clause selector will include all your Maximo saved queries for Work Order Tracking. You can pick one of these saved queries, or you can use the current list query in Maximo as the where clause, or you can create your own.
Editing existing custom work order layers. Users can also change the name and icon of any custom layer at any time by clicking the Edit icon (a gear) next to the layer name. In the Edit dialog, simply change the description or select a new icon or symbol, then click Save.

If you have the proper administrative access, you can create these custom layers for all users. To do this, check out the Administrative settings..