Miscellaneous
or section (MapEngine’s Miscellaneous settings page contains the options to configure custom marker images to represent points on the map, enable/disable work order hover, auto-open the tooltip, edit the work order configuration, and edit the home vicinity.
To navigate to the Miscellaneous settings page, go to the MapEngine settings, select the Miscellaneous tab on the top navigation bar.
Marker Images
Custom marker images can be created to represent data points on the map. Global Markers are available to all MapEngine users. Personal Markers will only be available to the user that adds the markers. If markers have already been uploaded, they will be represented under the marker type.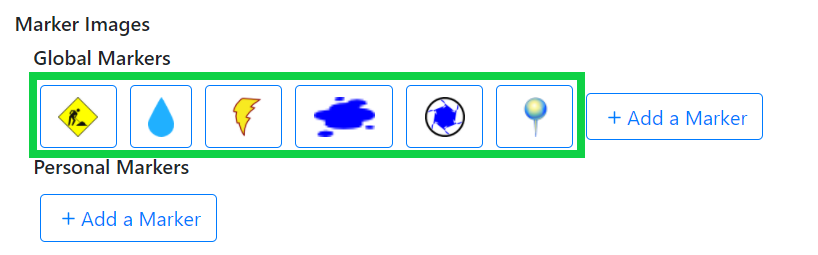
- To add a new marker, select Add a Marker.
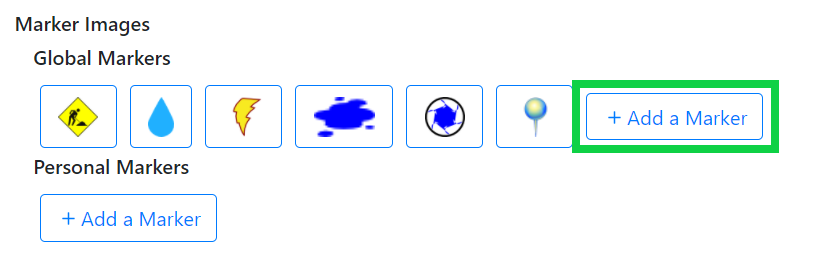
- Select Browse to choose an image for the marker.
- Optimal file types include .svg and .png
- File size must be smaller than 200px x 200px.
- Select Create to save the image and Cancel to cancel.

Work Order Hover and Auto Open Tooltip
Work order hover shows the work order number and description when the user hovers over work order points on the map. If feature clustering is enabled on the map, all features clustered together will show in a list when hovered over.
To enable work order hover, select the blue box next to Enable WO hover? Selection will show Yes or No according to if hover is enabled or not.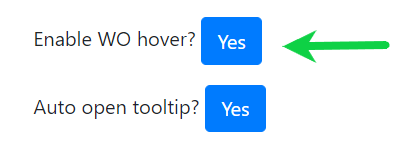
When features are selected, the feature can either be listed where the tooltip can be selected or the tooltip can be automatically opened. To auto open the tooltip, select the blue box next to Auto open tooltip? Selection will show Yes or No according to if auto opening the tooltip is enabled or not.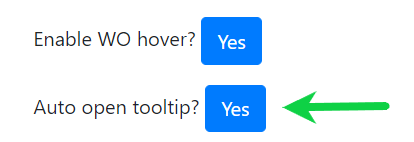
Work Order Configuration
When a work order is created or edited from MapEngine, a form of information is displayed. To configure the fields and layout of the work order data form, select Edit WO Configuration.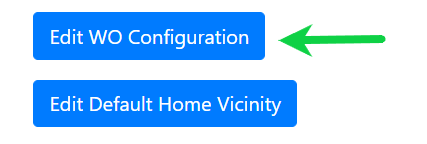
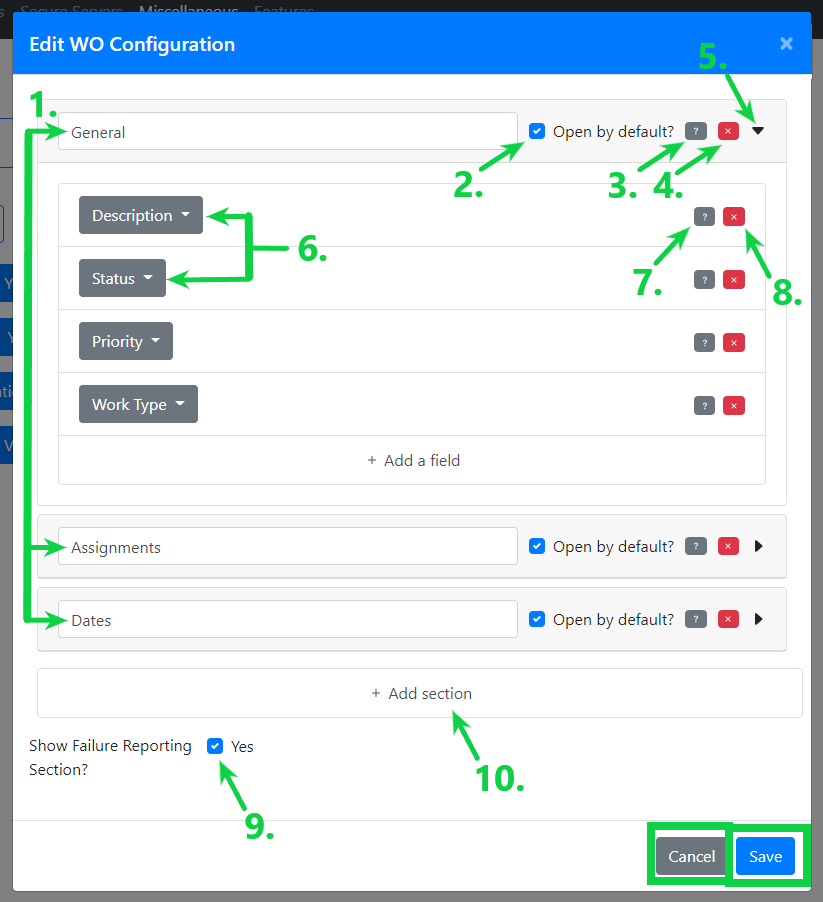
- Sections (groups) can be created to group the work order fields in the form. Names of the sections are displayed here. To create a new section, see #10.
- The sections can either be collapsed or open by default when a work order is added or edited. To open by default, click the box next to Open by default?.
- Select the ? on the same line as the section name to enter a conditional statement that will apply to the entire section. The conditional statement will determine if that section will show in the form or not. For example: ${depth} < 15
- Select the X on the same line as the section name to remove the entire section from the form.
- All sections are expanded by default while configuring the work order configuration. Select the triangle to collapse the group.
- To add an attribute field to the form, select Add a field, located under the section name. Once fields are added, they will be displayed in a list under the section name. Currently, the following fields are available for use in the MapEngine Edit Work Order form:
- Actual Finish
- Actual Start
- Commodity Group
- Crew
- Description
- End Date
- Lead
- Priority
- Scheduled Finish
- Scheduled Start
- Start Date
- Status
- Supervisor
- Target End Date
- Target Start Date
- WO Classification
- Work Group
- Work Type
- Conditional Visibility. To add a field condition to control the visibility of a field or section, select the ? on the same line as the field or section name, then enter a conditional statement. This statement must be in JavaScript and use field values on the WORKORDER record. For example, if you wanted to only show the Supervisor field when the WORKTYPE is CM, you would add a field condition like this to the Supervisor field: worktype==’CM’. You can use single or double quotes for strings. Here are more examples of operators you can use:
Operator Example is null fieldvalue ==” is not null fieldvalue !==” equals fieldvalue == “OPERATING” not equal fieldvalue != “OPERATING” and fieldvalue1 == “OPERATING” && fieldvalue2 != “OPERATING” or fieldvalue1 == “OPERATING” || fieldvalue2 != “OPERATING” - To remove a field from a section, select the X on the same line as the field name.
- To show failure reporting in the form, select the box next to Show Failure Reporting Section? This will allow the user to report asset failures, causes, and remedies.
- To add a new section to the form, select Add a section at the bottom of the Edit WO Configuration If no sections have been added, this will be the first option listed.
- To save the configurations, select Save or Cancel to cancel.
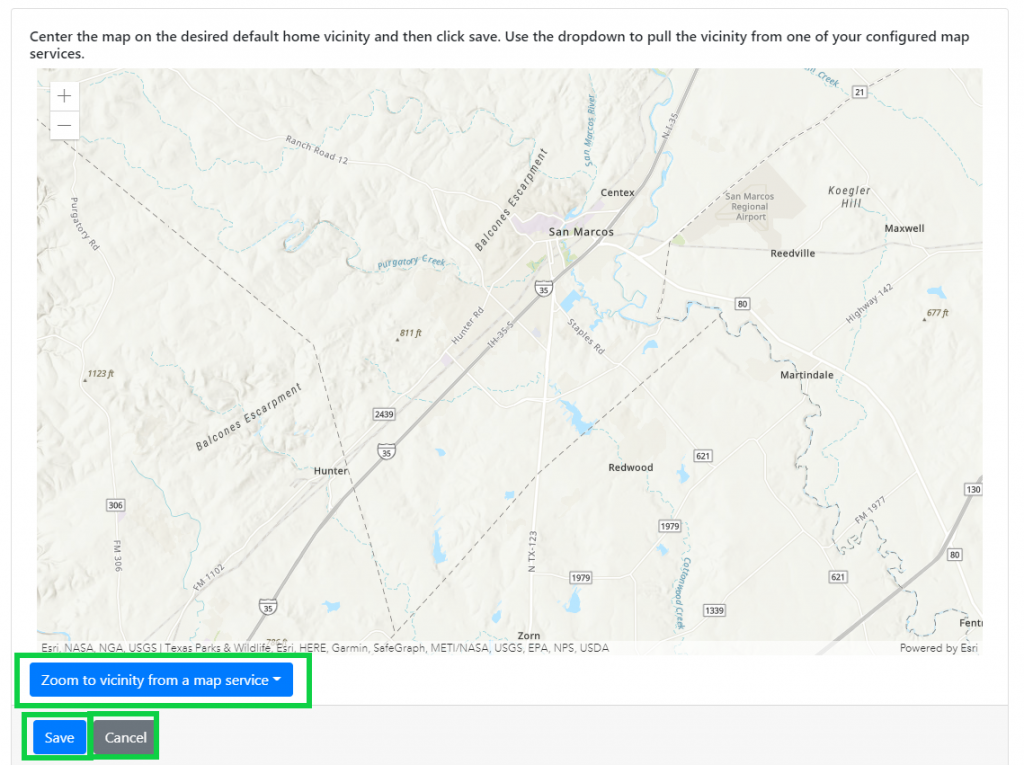
Default Home Vicinity
To change the home vicinity shown on the map when MapEngine is opened, select Edit Default Home Vicinity.
Center the map on the desired default home vicinity and then click save. Use the dropdown to pull the vicinity from one of your configured map services. Select Save to save or Cancel to cancel.