Adding the MapEngine Button
Adding the MapEngine Button
 To launch MapEngine, you need a button to push. Here’s how you add the button to a Maximo application (in this case using Work Order Tracking as the example):
Create Launch Entry Record
Go to System configuration > Platform Configuration > Launch in Context and create a new launch entry with the following values:
- Launch Entry Name: MAPENGINE
- Description: Launch MapEngine
- Console URL: /maximo/webclient/activeg/mappages/MapEngine.htm
- Target Browser Window: _blank
Create Signature Option
- Open wotrack.xml in Application Designer
- Click Select Action Dropdown and select Add/Modify Signature Options
- Click New Row, and fill in the following options:
- Option: AGMAP
- Description: Launch MapEngine
- Visible: Checked
- Advanced Signature Options
- Check “Associate to launch entry to enable launch in context”
- Launch Entry Name: MAPENGINE
Create Toolbar Button
- Open Application Designer from the Start Menu.
- Choose an application to edit (such as WOTRACK).
- From the Select Action menu, choose Add/Modify Toolbar Menu.
- Click New Row.
- Fill out the fields, like so:
- Element Type: OPTION
- Key Value: AGMAP
- Header Description: Launch MapEngine
- Position: 80 (or whatever works for the page)
- Subposition: 0
- Image: nav_icon_mapengine.png
- Visible?: Checked
- Tabs: ALL
Grant User Permissions
Next, you need to grant users the ability to see and access the MapEngine button.
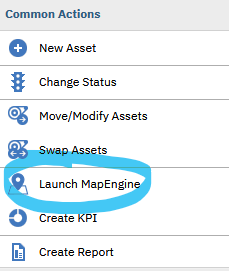
Go to Security > Security Groups and grant access to the MapEngine button, as shown below:

Important: Repeat this toolbar process for any other Maximo applications from which you want to open the MapEngine tab.
Note: If you want to see the MapEngine icon along with the Launch MapEngine text, you will need to copy the nav_icon_mapengine.png file from the …webclient\activeg\images directory and paste it into the appropriate skins directory, such as …webclient/skins//tivoli13/images/nav_icon_mapengine.png.
Finally, you’ll need to make sure that the Maximo application has the necessary MapEngine XML tag applied to the application XML.